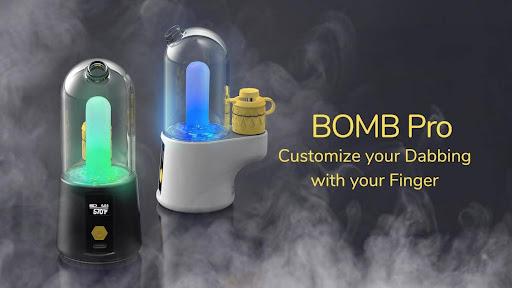
If you have used the Bomb electric dab rig before, you know about the big clouds after every inhale. It has features to help you get the best out of your concentrates, including the atomizer.
If you haven’t used it before, this is a chance to learn a few things about it and how to clean its production compartment. Cleaning its 18mm atomizer is crucial for the optimal performance.
You don’t want to deal with an bomb atomizer that doesn’t correctly transfer heat to your concentrates. Lack of proper cleaning may also lead to non-functioning.
Understanding the Bomb Erig’s Atomizer
The 18mm atomizer on the Bomb erig provides the ‘kitchen zone’ for your favorite dab. The design is composed of the following:
- A round-shaped atomizer with an outer thick plastic covering
- A rotatable carb cap at the top
- A height of 18mm
- Ceramic inner sidewall
- 360-degree inner sidewall for optimal heating
- Six contact points at the bottom
- Holes at the bottom (on the bottom’s side)

Those are the design specifications for the Bomb’s atomizer. It attaches to a base that enables it to get the charge from the electric compartment at the base of the e-rig. The attachment area also has a small opening for the air from the atomizer to the glass at the top.
The outer plastic covering lets you keep it in your hands even when the temperature is too high. That’s vital since you will use the rotatable carb cap to distribute the heat to your concentrates as you inhale.
The height of the atomizer is also crucial. It ensures that your concentrates sit deep into the atomizer and get heated until everything is done. On the outside, it also gives room for the attachment when it’s time to screw it to its rightful place.
The ceramic on the inner walls is great for quick heating. That is why you only need to wait for three seconds after setting the right temperature. By the time you get the green light from the Bomb erig, the atomizer has already ‘cooked’ your concentrates.
The 360-degree sidewall on the inner part also assists in optimal heating. When you combine that with the carb cap rotation, you get an atomizer that will leave nothing when you finish your session.
The six contact points at the bottom provide the proper charge for heating based on the set temperature. The added holes are for adequate ventilation as you inhale.
You must know what to expect from the atomizer. That way, you will learn the right areas to clean and how to do it.
When Should You Clean the Bomb Atomizer?
You should clean your atomizer after every use, as recommended by the Bomb’s manufacturer. However, you should know precisely the best times to clean your atomizer.
You should always clean the atomizer when you spot the following signs:
- There is residue in the atomizer after the session
- The taste is different even after utilizing the precise temperature control feature
- There is less vapor production
- Clogged airflow – The air inflow and outflow are not the same
All the issues we have listed above will trigger a need to clean the atomizer. However, it’s easier to note that their leading cause is residue buildup. So, if you cannot clean it up after every use, at least do it daily.
That way, you will have no problems with wax all over the atomizer. You also don’t want the residue solidifying after cooling and storing for a longer period. It may be hard to clean it up later. Too much wiping due to hard-to-remove residue may also damage the ceramic.
What To Do Before Cleaning the Atomizer
You must handle the atomizer with care as you clean it. That starts with using the right cleaning tools provided in the package. The inner sidewalls heat your concentrates.
So, if you want your Bomb erig to serve you longer, you have to take care of those walls correctly.
It also has contact points at the bottom and holes for the air passage. That means overall cleaning and maintenance must ensure these parts are not damaged.
Lastly, do not use harsh chemicals or non-recommendable tools to clean the atomizer. These risk damaging either part or all of it.
Cleaning Supplies Checklist
Before you start cleaning the atomizer, have the following ready:
- Isopropyl alcohol (90%+ is recommendable)
- Cotton swabs
- A small container for soaking purposes
- Paper towels (optional)
In most cases, as we can see, these items are only applicable when you need a thorough cleaning. When you have them ready, it’s time to clean.
How to Clean the Bomb Erig Atomizer
Precaution: You must let the erig cool off for a few minutes after the session.
There are two methods that you can use to clean the atomizer. They include:
- Dry cleaning
- Using isopropyl alcohol
Dry Cleaning
This method is suitable after every session. It involves using a dry cotton swab (q-tip) only when cleaning.
- After the e-rig has cooled off, disassemble the atomizer.
- Take off the carb cap to expose the inner side walls
- Take out a cotton swab. There are a few that come with the package
- Use it to wipe the inner part of the atomizer. Ensure that all the residue is wiped out.
- Occasionally, you can wipe the holes at the bottom if you spot some brown stickiness.
- After that, screw the atomizer in its position and close the top with a carb cap.
Using Isopropyl Alcohol Soak
This method is suitable when some wax remains after dry cleaning. It can also be used if you notice stains on the inner walls.
- First, disassemble the atomizer after cooling from the e-rig.
- Take off the carb cap.
- Get the small container and pour some isopropyl alcohol in it. You should pour enough to clean the atomizer.
- Take the cotton swab and dip it in the isopropyl to soak.
- Use the soaked cotton swab to clean the inner walls thoroughly.
- You can also use it to clean the holes at the bottom, but be careful not to touch the metal plates.
- Lastly, clean the opening that leads air to the glass at the base of the atomizer.
- Once you are done, use a paper towel to dry the inner walls and the holes carefully.
- If the atomizer is too dirty, you can submerge it in isopropyl for 20 minutes. After that, carefully wipe it with a paper towel.
- You can also let it dry naturally.
- After drying, reassemble it on the e-rig and store it safely or prepare for another session.
Wrapping Up
Cleaning the Bomb 18mm atomizer is essential for optimal performance and better heat distribution. Your concentrates need to burn the right way based on the temperature selected. In addition, you need proper inhalation for every hit.
When you purchase the Bomb electric dab rig, follow the instructions to ensure its longevity and good service provision.
The e-rig is readily available on the official website. Grab one for the best dabbing experience.